Kodi is a media player software that allows users to watch movies, listen to music, play games, and much more on any type of media device.
Kodi Build is a software Kodi addons on FireStick, which comes with a lot of possibility to get a lot of trouble and complicacy. You can uninstall Kodi Build from FireStick by using following simple process.
If you’re reading this article, you’ve probably noticed that your Kodi build isn’t working as efficiently as it used to. It may fail frequently or slow down. Whatever the exact symptoms you are experiencing, the problem may be that you have too many Kodi modules or add-ons installed. Kodi’s problems have probably caused you a lot of trouble, and you may be looking for a way to clean up and make a fresh start. Don’t worry – in this article I will explain how to remove the Kodi build on the FireStick to improve Kodi performance.
This method works for FireStick, Mac, Windows, Fire TV Cube and many other Kodi-compatible devices. Make sure you follow this article carefully and do not skip any steps. If you skip these steps, you may not be able to remove unnecessary Kodi builds on your FireStick to speed up Kodi.
Why Remove Kodi Assemblies?
Kodi is without a doubt one of the best and most used media player applications in the world. It offers unlimited entertainment at virtually no cost. And thanks to the many useful modules, you can watch TV shows, movies, subtitles, music and much more for free.
However, the problem with installing all these useful modules is that they take up a lot of memory. Especially if you’re a FireStick user, you’ll probably have a hard time storing these builds on your device because they take up a lot of memory.
This slows down Kodi and causes problems with streaming and buffering. Often developers do not support these builds, leaving you with a dead, unusable build.
As a result, people get rid of unnecessary builds that slow down Kodi and increase buffer time. A bonus tip is also to remove the dead add-ons that come with the builds. This frees up valuable space on Fire and Android TVs.
Attention Kodi Users: Please Read Before Continuing
Kodi addons / modules offer unlimited streaming content, but can also get you in legal trouble if you get caught watching movies / TV shows / sports for free. Kodi users are strongly advised to always connect a VPN when streaming online. A good Kodi VPN can hide your identity, bypass government surveillance, block content, and ISP throttling (which also contributes to buffer-free streaming).
I use ExpressVPN, which is the fastest and most secure VPN. It is very easy to install on any device, including the Amazon FireStick. Get 3 months free and save 49% on annual plans. There is also a 30 day money back guarantee. If you are not satisfied, you can always ask for a refund.
Click HERE to get 3 months free and save 49% on ExpressVPN.
Read: How to install and use VPN for Kodi
Kodi Builds Removal Guide
We will use the Fresh Start method to remove builds from Kodi to improve the performance of Kodi.
Before proceeding with this method, I recommend you install the Indigo add-on to avoid complications. Without Indigo, Kodi often fails to install the zip files for the store we need to install the Fresh Start plugin on Kodi. Also, make sure you uninstall all add-ons installed on Kodi.
Restart Method
This method is our main recommendation because it allows to recover all important data such as caches, icons, files and thumbnails created by builds or add-ons.
So let’s get started:
- Turn on the FireStick (or whatever device you are using) and open Kodi.
- At the top of the left pane of the Home screen, click the Settings button, which looks like a cogwheel.
- Select the File Manager icon in System Preferences.
- Three options are now displayed in the interface. Finally, select Add Source.
- Kodi opens a new window with a text box. Select <No>.
- In the text field you can now enter text or paste (source link). Type or paste the following URL into the text box: http://dimitrology.com/repo
- Select OK, and the interface will now prompt you to specify or enter a media source name. You can use any name you want, but I suggest you call it dimitrology, as I did. Whatever name you use, don’t forget it – in a few steps you’ll need to find the repository under that name.
- Press OK again to confirm and continue.
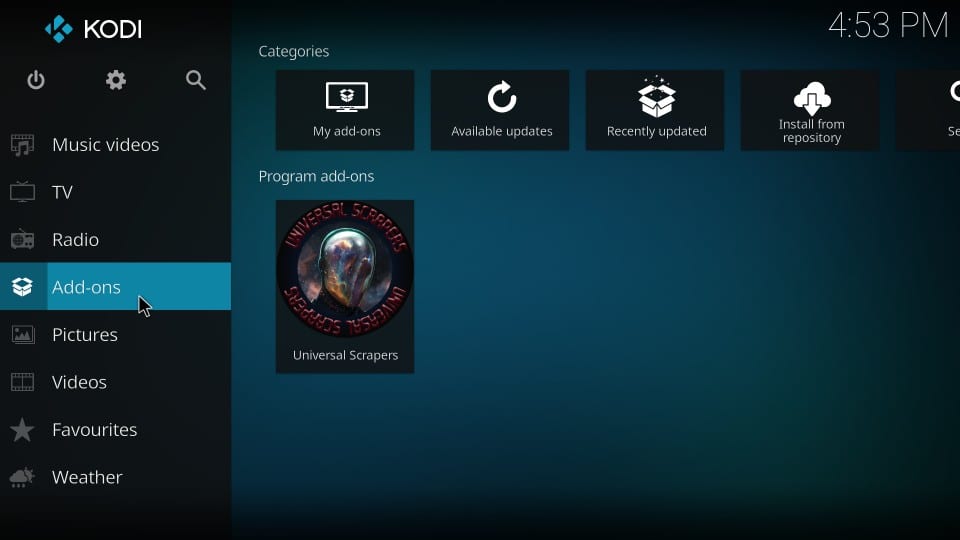
- If necessary, go one step back to select Extras. If you don’t see it right away, go back to the home screen, scroll down and look for Extras.
- In the Add-ons section, scroll down and select Install from zip file.
- If you have not yet activated the installation of add-ons from unknown sources, you will be alerted by a security message.
- Click Settings, then Unknown Sources, and click OK to accept the risk. You can undo this change at any time later.
- A new window will appear with a list of directories. Find and select the source name you specified after entering the source URL. If you call the source like I do, search for dimitrology.
- Several zip files are now displayed in the interface. You need to find a file called freshstart. The pattern of the file name is video.freshstart-x.x.zip (x is a number indicating the version or update). Select this file to have Kodi download the Fresh Start installation files.
- Within seconds, the system downloads the installation files.
- Return to the Kodi home screen (press the Back button repeatedly). Select Add-ons, then select the Fresh Start add-on.
- The system displays a confirmation message asking if you really want to restore and reconfigure the default Kodi settings. Press YES to continue.
- It takes a while for Kodi to return to its default settings. When you’re done, you’ll see a message asking you to restart Kodi or, preferably, reboot your system.
- Close the application, reboot the FireStick or other devices, and launch Kodi. Kodi will be reset to the old settings.
Supplement
Never forget to remove unnecessary add-ons and other data before uninstalling Kodi assemblies. This saves you a lot of storage space on your device, which you can use for other applications.
The New Start method is also very useful if you want to remove many add-ons at once.
We do not check the legality or safety of any add-ons, applications or services mentioned on this website. Furthermore, we do not promote, publish or link to copyrighted feeds. We strongly condemn piracy and urge our readers to avoid it at all costs. Any mention of free streaming on our website refers only to non-copyrighted public domain content. Read our full disclaimer.
We are a reader-supported blog. If you purchase an item through the links on our website, we may receive a commission. Read more
We Need Your Support
- Telegram
Frequently Asked Questions
How do I remove a build from Kodi on FireStick?
To remove a build from Kodi on FireStick, go to Settings -> System -> Builds, and then select the build to remove.
How do I remove old Kodi builds?
To remove a Kodi build, you will need to use the Kodi GUI. From the Kodi home screen, select Add-ons and then select the Builds option. From the Builds menu, select the Builds tab, and then select the Builds you would like to remove. Select the Uninstall button.
How do I get out of No Limit build?
If you are in a No Limit build, you will be unable to get out of this build.